Be Your Own Model
AR-guided photo capture flow to enable static virtual try-on
Launched Sep. 2022
Computer vision &
Augmented Reality based
iOS, Android, mWeb, dWeb


Become a Virtual Model
Full flow
Watch the full user flow uninterrupted.


About Walmart
Walmart is a Fortune 500 American corporation that owns and operates a vast number of super-centers across the US and around the world, alongside a large online presence as a retailer and marketplace.
About Be Your Own model
‘Be Your Own Model’ is an e-commerce tool that lets users virtually try on clothes directly on the product page.
To enable that, users go through an AR and voice-guided image-capturing process.

UX designer
Leena khwaj
Content design
Caitline Brown
UX director
Joe Grinbaum
UX reasercher
Stephanie Gannon
Product
Shivang Patel
Dev team lead
Gireesha Shieony
Overview
Problem and solution
Customer problem
When shopping for apparel online, it is difficult for customers to replicate the in-store experience of trying something on and seeing what it looks like.
While online they are limited to seeing a picture of the item or the item on a model that does not look like them.
Proposed solution
By viewing products on themselves, customers can get more information about the product they are interested in, for intense if the product fits their body shape, whether if it is in their desired length, or if the color is flattering to their skin tone.

Overview
Market target
280M
Daily online shoppers
in the US in 2023
37M
Daily Walmart customers
12.4M
Daily Walmart apparel customers


20% of global online customers
Walmart daily market size
From online customers
Pre design
Initial User Study
Before starting to design we conducted an extensive user study to understand the customer mindset, level of trust, and willingness to use the tool.
We send out an email invite to about 24k Walmart apparel customers inviting them to gain early access to the technology and instructing them how to take and upload a photo of themselves.
Following the user's journey and seeing the images they uploaded was not satisfactory so we knew we had to go back to the drawing board.
This is why we decided that the experience must start with a smart AR camera that will guide our users and auto-photograph them at the right moment according to the requirements.

Design
User Flow

Design
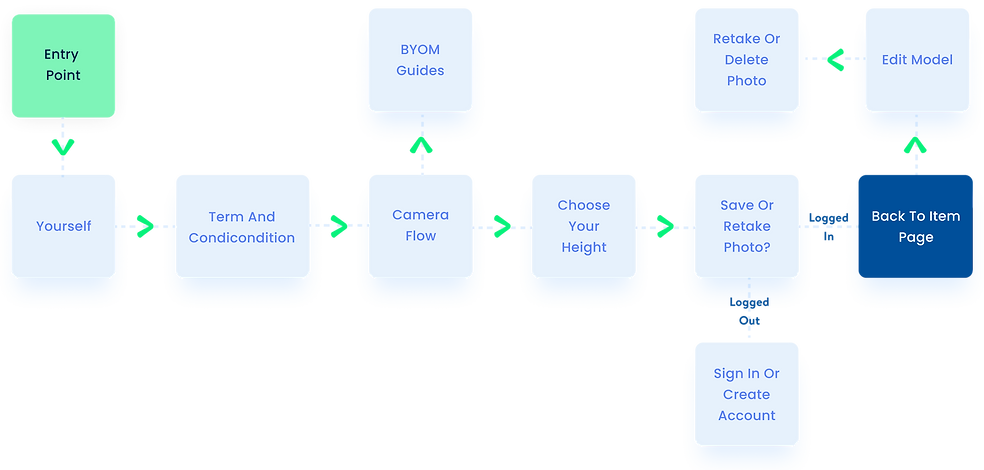
Entry Point
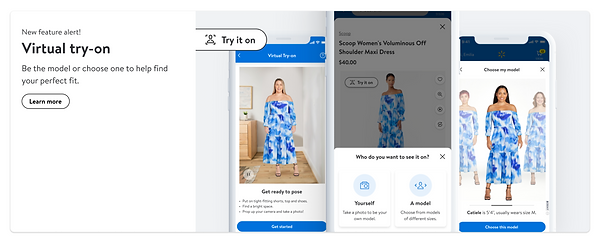
On the product page, there's a new CTA "Try it on", by clicking, users reveal two options:
Try the clothes on Yourself
Try the clothes on a Model
* We merged the two AR apparel experiences into one CTA to not overload the product page.


Design
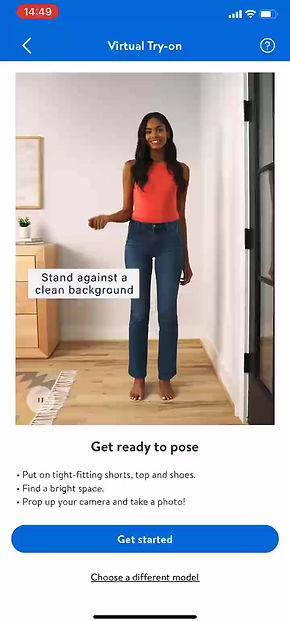
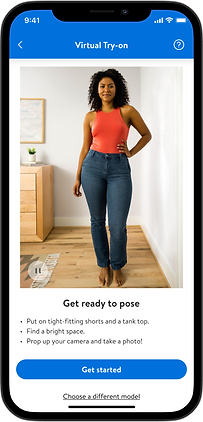
Get ready to pose
The experience starts with a "Get Ready" video instructing users how to get ready to take a successful photo.
Considering this is a self-portrait taken indoors and not in a photo studio, the starting point is not ideal, by following the instructions, customers can be sure their photo will look great and result in successful virtual simulations.
Design
Smart camera, AR-guided flow
Real-time instructions
From our research, we know that most users using this tool will likely be alone and take a picture of themselves with their front camera. The user will put the phone down and step away from it to take the photo.
For that reason, we chose to use voice instructions, accompanied by large text, making sure the user is properly guided step-by-step to the perfect position.


Device angle detection
The smart camera knows how to recognize the angle at which the camera is placed and guides the user to adjust the camera to the best angle (80-90 degrees).


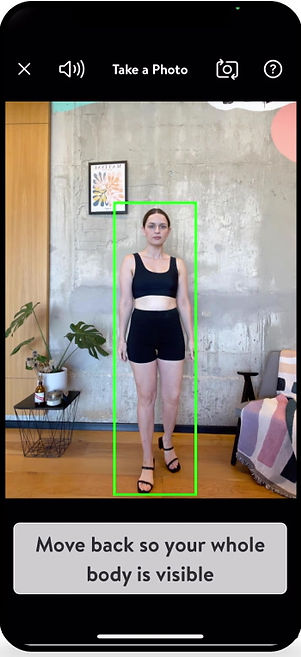
Body detection
The camera uses computer vision to recognize all body parts and the user's position and movements in real time.
If a correction is needed, the instructions change accordingly, and this is how we guarantee that the picture will be the best.


User clothing detection
To prevent the user's clothes from showing up in the final simulation, we require them to wear a tank top and shorts. The camera can detect what the user is wearing, and asks them to change if it's needed.

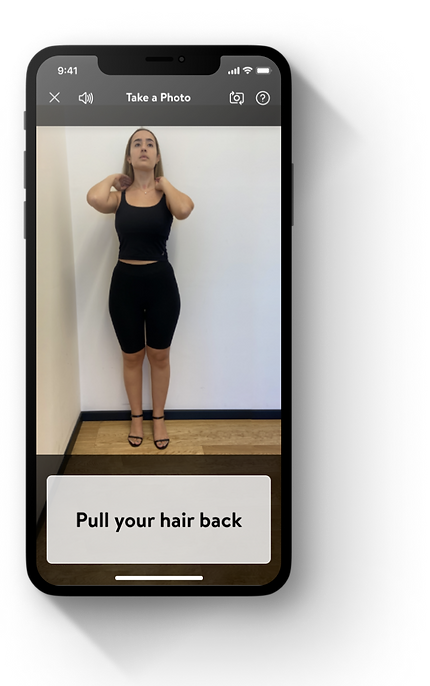
Hair detection
If the user's hair is obstructing their shoulders we ask them to move their hair back.

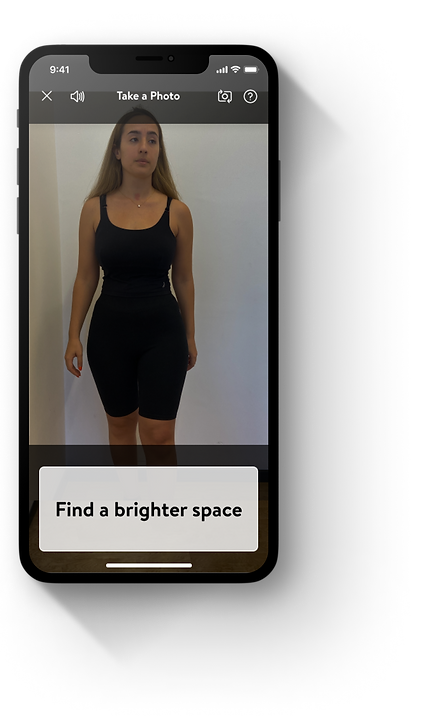
Light detection
Lighting is crucial to achieving any good photo, especially one meant for virtual simulations. If the lighting conditions in the room aren't ideal, we'll direct the user to adjust the lighting.

The countdown
The moment the camera detects that the user has met all the requirements, it counts down three seconds and takes a picture automatically.


Design
Size indicator
In order to create a truly accurate simulation the AI team requires a single measurement from which all other measurements can be deduced.
During research we identified height as a commonly known measurement all users can easily provide.
This step appears last and has a dual purpose, besides the height intake, users can see their photo, decide if they like it, and choose whether to retake it.
Design
Processing your photo
A short, repetitive animation clip keeps the user occupied while their image is being processed for up to 15 seconds.

Design
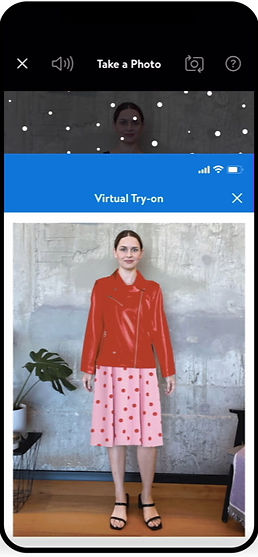
Review your image
Lastly, after the user's image has been processed, they can see a sample of what clothes might like on them and make a final choice about whether they approve this image or wish to retake it.
Once approved the user will never have to go through this flow again as this image is now linked to their Walmart account and will automatically appear on the product page.
Design
Back to Item page
At the end of the image-taking flow, the user returns to the item page where they see themself as a model virtually wearing the garment.


Design
Edit model
If users wish to they can use this screen to see their photo wish a basic outfit, delete it, or even reset their view back to the original model.

At the time of development, most common desktop cameras could not support an AR-guided image capture flow.
As Desktop-web is an important platform for Walmart we chose to allow users with images taken in the app to be able to see and use their interface.
Desktop
Design
Launch
Marketing assets
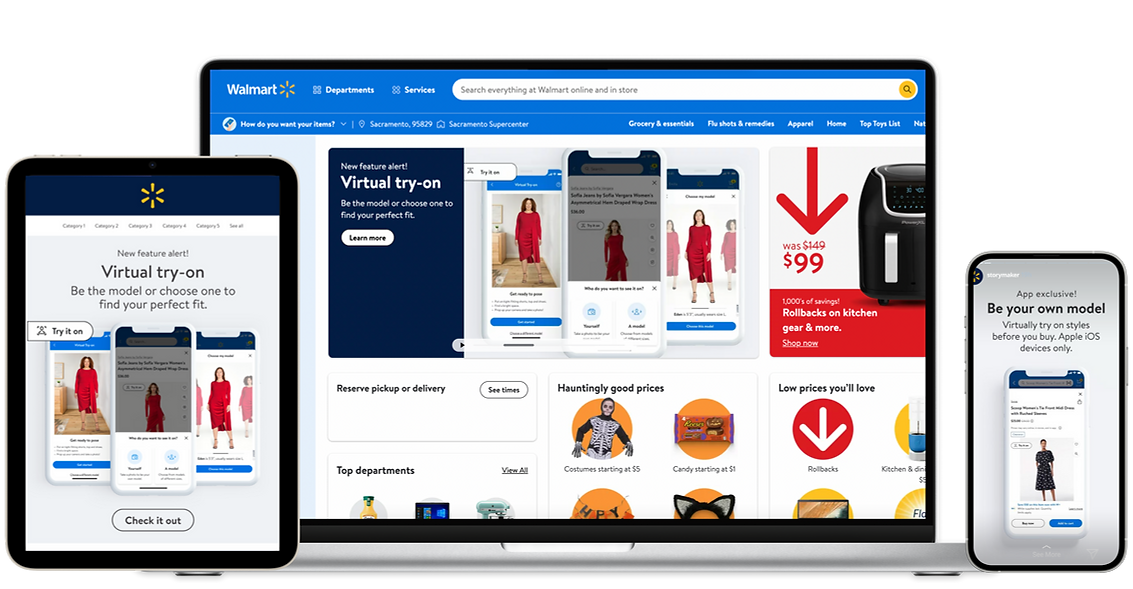


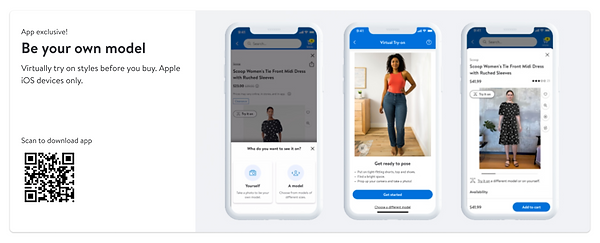
Launch
In the Press


Post-Launch
Quotes from users
“Totally recommended”
Yes, I really appreciate the personal aspect of being able to actually fit clothing on you from the comfort of your home.

RestlessCherry3067
49
Female
$50,000 - $69,999
United States
“Very helpful”
It’s sometimes hard to picture how a clothing item might fit - so the be your own model would help me to get a more accurate idea.

lawills94
29
Female
$80,000 - $99,999
United States


Post-Launch
Business impact and stats
Customers engaging with Apparel VTO experience compared to those who do not.
X2
Add to cart
6%
Average Order Value lift
21%
GMV lift
2.4%
Reduction in return rate

Post-Launch
Enhancements 2023
Being first to market means there is no one to look at for learning and inspiration, so after launching our groundbreaking VTO tool we conducted multiple user studies and followed analytics closely to learn how might we improve the tool for our users.

Enhancements
Problem:
The onboarding video is often ignored
Our research found that the customers didn’t understand that this flow results in one photo but thought that they would have to launch the camera on each product they wanted to try on.


Enhancements
Solution:
Break up the video to steps
We chose to divide the video into a few separate steps and change the visual instructions to be more technical and easier to understand.
The instructions are separated into cards, with one instruction on each card.


Before


After
Enhancements
Problem:
Customers don't change to minimal clothing
Customers don’t understand why they need to change their clothes, so they don’t do it until they are instructed to by the AR-guided camera..
"It's just too much effort for not enough reward."
"Tell them before that they're gonna have to wear a tight tank top and tight shorts so they know in advance before they start the process and don't feel like they're stopping in the middle to change their clothes."
"…So I did notice that the clothing that I had on, with it being a scoop neck, maybe I need to change the clothes to maybe even less clothing."

Enhancements
Solution:
Explain why they should change clothes
Listening to our customers, we understand that they would be willing to change their clothes if they understood the reason behind it.
We created this view to show customers what the final result will look like depending on what they wear.

Before
After
Enhancements
Problem:
The servers rejects images because of poor lighting
About 20% of images that are sent to the server are rejected due to poor lighting conditions. The smart camera can detect darkness but not at the highest accuracy, so some images get noisy, blurry, or just too dark to process.

Enhancements
Solution:
Give a clear explanation before launching the camera
By providing customers with clear instructions before the camera launches, we hope to make the overall process easier and faster, we will disclose more information about the required space and where to place their device.

Before
After
Enhancements
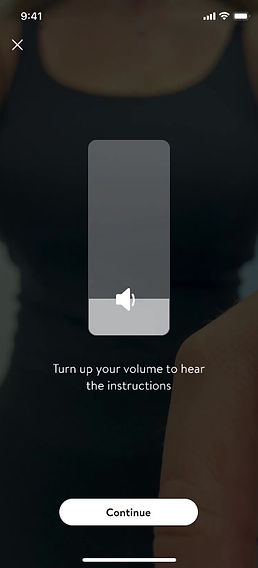
Problem:
some customers don’t hear the voice instructions
Enhancements
Solution:
Add an instruction to turn the volume up
Adding volume detection and presenting this animation to users who need to turn the volume up.

Enhancements
Problem:
It’s unclear where to place the phone and where to stand
Users seem to get confused when the camera launches and are not sure where to place their device and where exactly they should stand.


Enhancements
Solution:
Clear explanation before launching the camera
By providing customers with clear instructions before the camera launches, we hope to make the overall process easier and faster, we will disclose more information about the required space and where to place their device.

Enhancements
Problem:
The level marker is not clear enough
It’s clear from our user testing that the current design of the yellow level is confusing for many customers, as they seem unsure of what to do at this point.
Enhancements
Solution:
Redesign the level marker
We created a more intuitive, familiar, and understandable level design, based on the iOS internal level tool.


Design
Style guide
Primary & accent colors
Walmart app Primary action color
#0071DC
#fffffff
Background Color
Drop down
General screen
Tab
#F8F8F8
#fffffff
#E3E4E5
Typography color
Primary
On dark
#2E2F32
#fffffff
Typography color warning
Warning
error
Success Text
Success BG
Warning Text
Warning BG
#662B0D
#9B1419
#2A8703
#EAF3E6
#FFE190
#FFF9E9
Detection & scan lines
Layout grid
#FFF200
#DE1C24
#fffffff

Typography

Shadow


